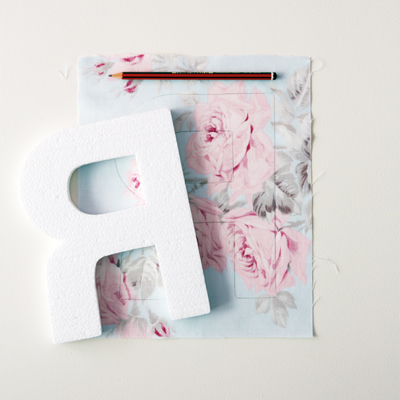
We found the cutest DIY project on the IDEAS Magazine website and we just had to share it with you. These fabric covered letters will look smashing in a nursery or kids bedroom. It seems like an easy little project that will also give you the opportunity to get rid of leftover pieces of fabric. I’m sure you can also try the same trick with wallpaper samples, scrapbooking sheets, or beautiful gift wrapping.
You will need
• polystyrene letters
• fabric remnants
• pencil
• set of compasses
• ruler
• needlework scissors
• modge podge
• paintbrush
• cutting mat
See the original DIY post on the IDEAS website: here
{Click on the images to enlarge and view the step-by-step instructions}
1) Cut a fabric square a few centimetres larger than your letter.

2) Place the letter on the fabric as a mirror image and trace the outlines of the letter with a pencil.

3) Measure the thickness of the letter with a ruler or measuring tape. Our letter measured 15mm.

4) Place the pencil in the compass and measure 15mm then set the compass accordingly.

5) Place the point of the compass on the pencil outline of the letter on the fabric so the pencil is 15mm from the edge. Follow the line of the letter with the compass point and draw a pencil line 15mm right around the letter.

6) Cut out the fabric along the new outline that you have drawn.

7) Paint the right side of the letter with a layer of modge podge.

8) Turn the letter over and stick it in position on the wrong side of the fabric inside the lines.

9) Turn the letter over and paint another layer of modge podge over it, then leave it to dry for an hour or two.

10) Cut notches in the fabric at the corners and curves.

11) Paint a coat of modge podge on the sides of the letter and stick the fabric in place, smoothing it down with the paintbrush. Leave to dry.

12) Once the modge podge is dry you can turn the letter over and trim away any excess fabric that sticks out at the back with your needlework scissors.

13) Paint a piece of fabric with modge podge on the right side and leave to dry. Now cut the fabric into 15mm strips using a rotary cutter.

14) Stick the strips around all the edges of the letter with modge podge and leave to dry.


Very cute!
Hello Lovelydeer – I guess that once in a child’s room setting it could look even cuter!